Lesson: Painting Community Portraits
Overview
Artists use paint to capture life, tell stories, express feelings, and work through ideas. In this lesson students experiment with tools and techniques used in painting. They compare oil, acrylic, and watercolor paints, and then they explore ways to build texture, create shapes, and suggest movement. Finally, students combine techniques to paint a portrait of a person in their community.
Learning Objectives
- Be able to define techniques and give examples.
- Improve their art vocabulary by using key terms during discussions.
- Create a composition that effectively uses different kinds of mark-making.
- Analyze their work and that of other students through individual and group discussions
- Canvas
- Canvas paper ( 8 x 10 inches or larger)
- Acrylic, oil (low grade/water soluble), or watercolor paint
- Palette knives or popsicle sticks
- Paint palettes
- Brushes
- Old cloths
- Paper towels
- Cups of water
- Sponges
- Pencils
Experiment with tools and techniques
Orient the canvas paper (or use watercolor paper as an alternative) in portrait layout and divide it into seven sections. Use two sheets if needed. Students should label each of the seven sections with one painting technique. If possible, try each technique with oil, acrylic, and watercolor paint.
Helpful hints
- Cover desks with paper or newspapers before beginning to paint.
- Identify which palette knife is used with oil paints by marking the handle or wrapping tape around it. Do not mix oil with acrylic or watercolor paints. A popsicle stick is a good alternative to a palette knife.
- Use water and paper towels to clean brushes and palette knives dipped in acrylic or watercolor paints. Use any kind of shampoo to clean brushes that were immersed in oil paint.


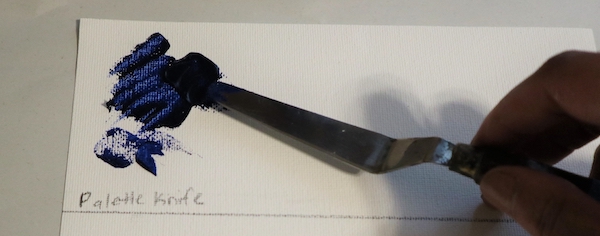
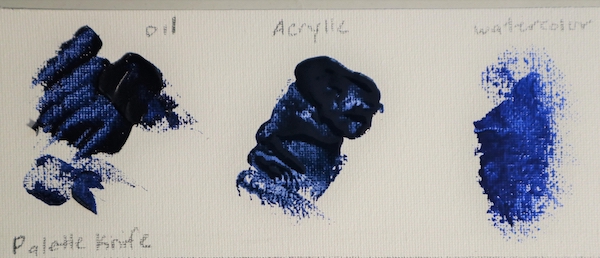
Place a small amount of each paint onto the palette. Use the palette knife to scoop up a bit of the paint. (Skip this step if you’re using trays of watercolors instead of tubes.) Scrape the palette knife across the canvas paper to produce different kinds of marks.
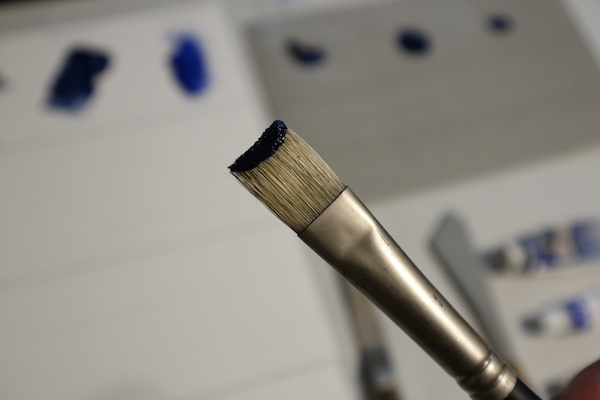
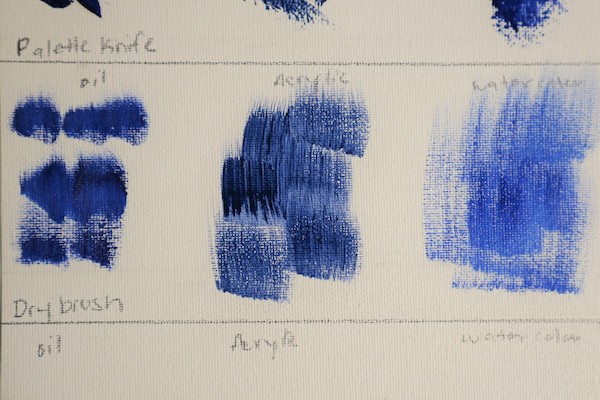
Dry brush: Use a dry brush to scoop up a small amount of paint. Drag the brush across the surface to create a scratchy effect.
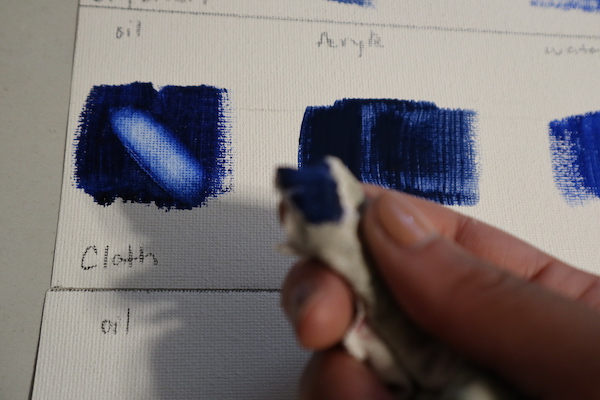
Cloth: Paint a square with each medium (oil, acrylic, watercolor), then swipe a finger wrapped in a cloth across each one. Use a different cloth for each type of paint.

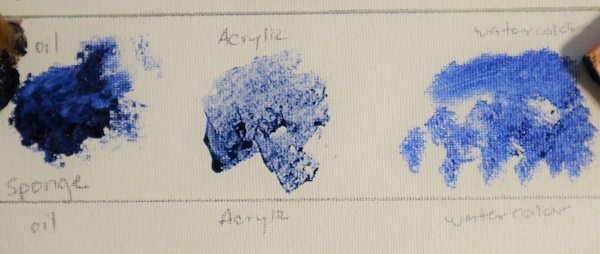
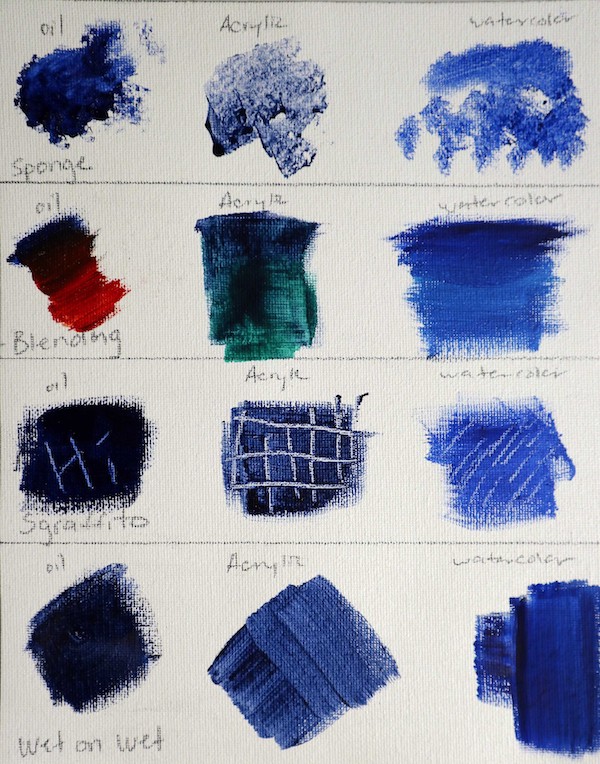
Sponge: Dip the corner of a sponge into each type of paint, and then dab and smear it onto the surface. Notice the different effects created. Natural and kitchen sponges produce slightly different results.

Blending: Choose another color for each paint type and place a small amount of it onto the palette. Place one color at the top of the section. Slowly move it down with a palette knife, and then add in the next color. Continue to smooth each color into the other to create the effect you want.

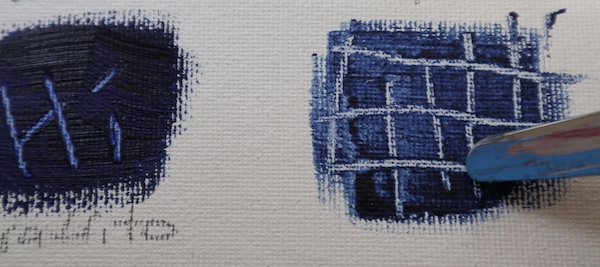
Sgraffito: Paint a square with each medium, then use a palette knife or the end of a paintbrush to scratch into the surface after the paint is dry.

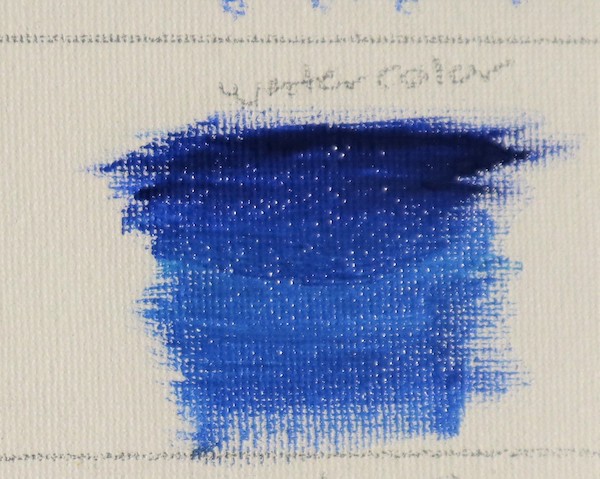
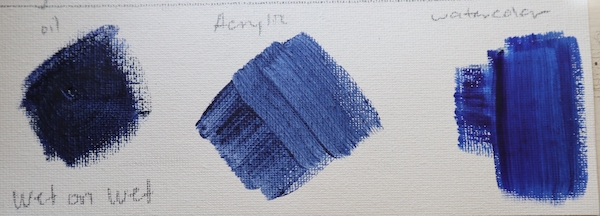
Wet on wet: Make a square with a medium amount of each paint, and then move the wet paint around the surface to experience this different technique.

Take a moment to review the techniques together. Clean the acrylic and watercolor brushes and sponges with water and set them aside to dry. Clean the oil paint brushes with any kind of shampoo..

Reflection
Take a moment to talk as a class about the painting process and different painting methods. What was it like to experiment with these tools and techniques? Which was your favorite and why? What was a challenge?
Choosing a Subject and Style
Take another look at the artist video and the selected paintings from the National Gallery’s collection. As a class discuss which techniques are visible. How do the techniques affect the finished painting?
After becoming more familiar with painting techniques, encourage students to paint a portrait of someone they know or admire in their community. Have them consider:
- Which qualities of that person do they want to convey in the portrait?
- Which tools and types of paint would best convey those qualities
- How can they capture the subject’s energy or emotion with brushstrokes or mark-making?
Compare Portraits
Have students share their portraits as a class and reflect on each students’ artistic choices. How were the same painting tools and techniques used in similar or different ways? Consider how a different subject might impact the choice of technique.
Core Arts Standards
VA: Cr2.1.8a Demonstrate willingness to experiment, innovate, and take risks to pursue ideas, forms, and meanings that emerge in the process of artmaking or designing.
VA: Cr2.3.7a Apply visual organizational strategies to design and produce a work of art, design, or media that clearly communicates information or ideas.
VA: Cr3.1.8a Reflect on and explain important information about personal artwork in an artist statement or another format.
VA: Re8.1.7a Interpret art by analyzing artmaking approaches, the characteristics of form and structure, relevant contextual information, subject matter, and use of media to identify ideas and mood conveyed.